While developing the Selenium WebDriver test automation scripts, the scripts are executed within Eclipse.
But as soon as the scripts work as expected, you may want to make the scripts available to other team members.
Like other manual testers.
Or developers.
You may also want to run the test scripts automatically as scheduled jobs.
Or use them in a continuous integration process.
All these require the ability of running the test scripts in the Command Prompt.
Let`s see how you can do this.
We will use an example project that automates the following test case:
- opens the home page of the Vancouver Public Library site
- checks if the home page title is correct
The project uses 2 classes: test class and home page class.
TEST CLASS
import static org.junit.Assert.*;

import org.junit.After;
import org.junit.Before;
import org.junit.Test;
import org.openqa.selenium.WebDriver;
import org.openqa.selenium.firefox.FirefoxDriver;

public class TestClass {

  WebDriver driver;

  @Before
  public void setUp() {
    driver = new FirefoxDriver();
  }

  @After
  public void tearDown() {
    driver.quit();
  }

  @Test
  public void testScript() {
    HomePage homePage = new HomePage(driver);
    homePage.open();
    assertTrue(homePage.isTitleCorrect());
  }

}
HOMEPAGE class
import org.openqa.selenium.WebDriver;
public class HomePage {
  WebDriver driver;
  String url = "http://www.vpl.ca";
  String title = "Vancouver Public Library - Home";

  public HomePage(WebDriver driver) {
    this.driver = driver;
  }

  public void open()  {
    driver.get(url);
  }

  public Boolean isTitleCorrect() {
    return driver.getTitle().equals(title);
  }

}
The following phases are needed for running this code from command prompt.
Everything that follows assumes that Maven is installed on your computer.
If you dont have it installed, use this link for instructions.
If you want to learn more about Maven, this is a very good tutorial.
-
Create the Maven Project
This can be done manually without Eclipse.
Or you can use Eclipse for generating the project:
- Open Eclipse
- Click File, New, Project
- In the New Project window, expand the Maven category
- Select Maven project and click Next

- Check the Create A Simple Project checkbox
- Click Next
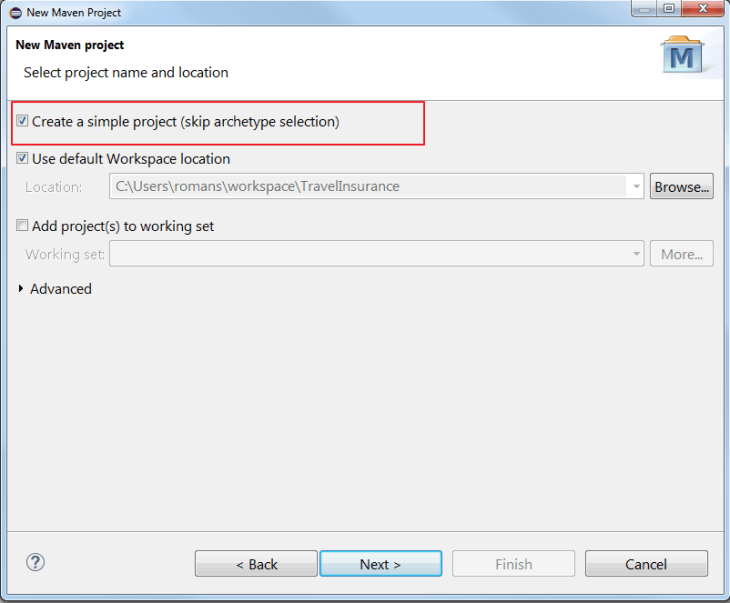
- Configure the Maven project by providing the Group ID, Artifact ID and Name

- Click Finish
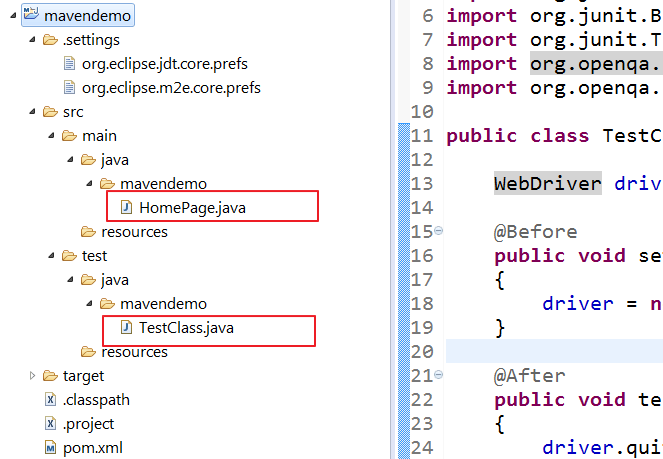
The project is created and it shows in the Navigator panel of Eclipse.
You can see the project structure by expanding the project node:

The project folder includes
- SRC folder; includes source code for the test and page object classes.
- TARGET folder; includes the resources generated by compiling the source code.
- POM.XML file; it defines the project dependencies
Under the SRC folder, you will find 2 folders:
- main; the page objects go here
- test; the test classes go here
When the project is created, the POM.XML file has just a few lines:

The project does not have any dependencies added yet.

2. Add dependencies to the POM.XML file
2 dependencies are needed for our project:
- JUNIT
- SELENIUM
They are added to POM.XML by editing the file:

The project has now 2 dependencies added to it:

3. Add the test and page object classes to the project folders
Next, we need to add the test class to the SRC – TEST – JAVA folder.
The page object class is added to the SRC – MAIN – JAVA folder.
4. Execute the Maven Project in Eclipse
The Maven project can be executed by
- right clicking on the project name
- clicking Run As
- clicking Maven Test

The test script is being executed and the results are displayed in the Console panel.

After the project execution, you can see the .class files in the TARGET folder of the project:

5. Run the Maven Project in Command Prompt
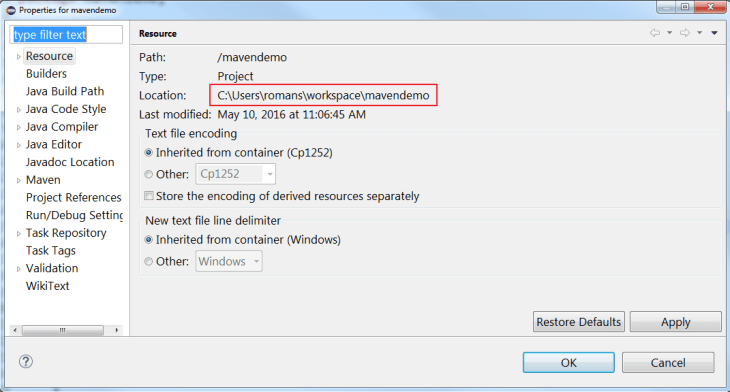
First, we need to get the project folder path.
This can be done by
- right clicking on the project name
- clicking Properties
- getting the value of the Location field
The last steps of the process are:
- close Eclipse
- open Command Prompt
- go to the project folder path
- execute the project using the mvn test command

Try to create your own project using this short tutorial.
If you have any questions, please leave them in the Comments section.

Nice article..!! But how can we run testNG project using command prompt??
LikeLike
Thanks, Shrikant.
The only change to do is to add the TestNG dependency to the pom.xml file instead of the Junit dependency.
LikeLike
Hi.. How can we run the executable Jar file generated after Maven Build in target folder in command prompt ?
LikeLike
Hi Alex,
How to Convert above created maven project to runnable jar file.
Thanks in Advance
LikeLike
Hey Alex, how do we Pass Parameters from Command Line to a Selenium Project using Maven Command with pom.xml ? I mean I want to pass username and password through maven command line and my java method should pick and run.
Thanks.
LikeLike